Getting Started
Prerequisites
- Figma account (free or paid)
- Roblox Studio installed
- HTTP Requests: only required for Live Mode (Experience Settings → Security → Allow HTTP Requests). ZIP and Code modes work without it.
Step 1: Install the Figma Plugin
- Go to the FigBloxUI Figma Plugin page
- Click “Install”
- The plugin will appear in your Figma plugins list
Step 2: Install the Roblox Studio Plugin
- Open FigBloxUI on Roblox Creator Marketplace
- Click “Install”
- The plugin will appear in your Studio toolbar
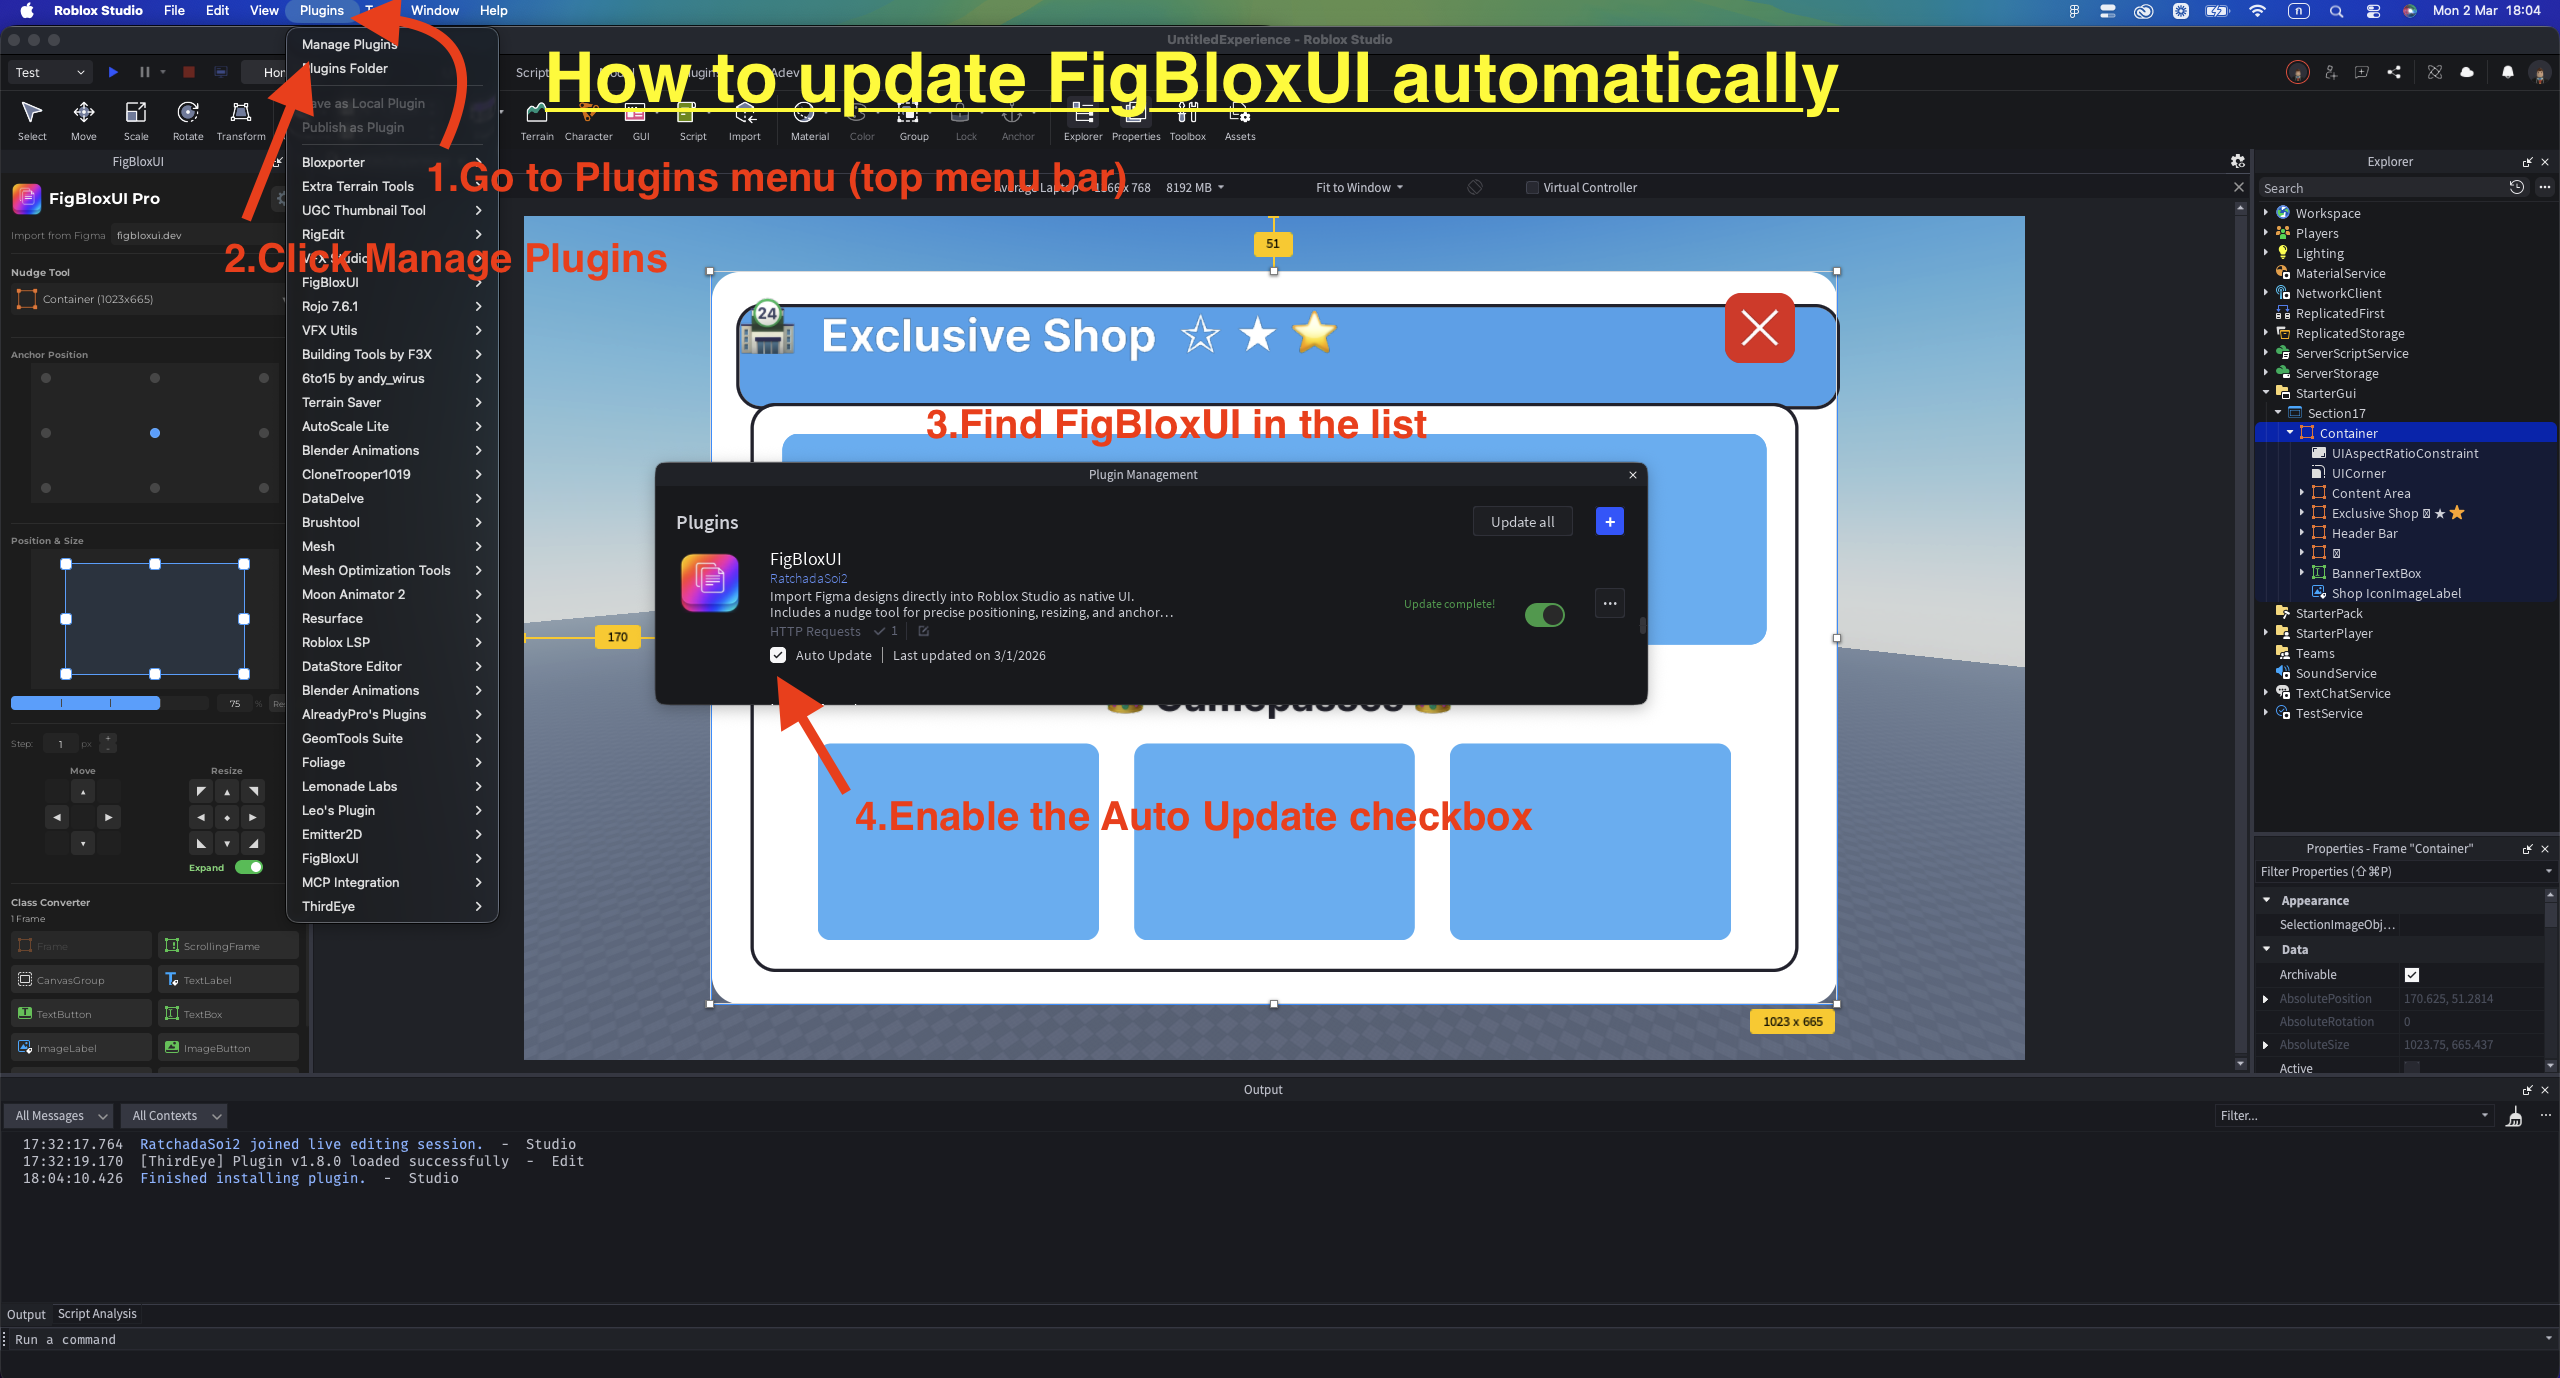
How to Update the Roblox Studio Plugin
- Go to Plugins menu (top menu bar)
- Click Manage Plugins
- Find FigBloxUI in the list
- Enable the Auto Update checkbox
Optional: Enable Native Roblox UI Beta
FigBloxUI can export supported Figma shadows as UIShadow and individual corner radii as native UICorner properties when Roblox’s beta UI primitives are enabled.
- In Roblox Studio, go to File → Beta Features
- Enable New UI Capabilities
- Restart Studio
- In the Figma plugin, open Settings
- Enable Roblox native UI beta
- Export or Send again
Roblox staff announcement: Studio Beta: New UI Capabilities, Shadows & Individual Corners
Step 3: Choose Your Export Mode
FigBloxUI has 3 export modes. ZIP Mode is the default, no Roblox login needed.
ZIP Mode (Default, No Login)
- Open the Figma plugin (Plugins → FigBloxUI)
- Select a frame in Figma
- Click “Export ZIP” → Download the ZIP file
- Click “Copy Code”
- Upload images from the ZIP to Roblox via Asset Manager (Game → Asset Manager)
- In Asset Manager: select uploaded images → right-click → Insert
- Images appear in ServerStorage → Loaded
- Open Studio plugin → Go to Paste Code tab
- Paste the code → Plugin auto-scans Loaded folder and matches images
- If not all matched: drag from the Image Gallery below, or click “Scan”
- Click “Import”
Code Mode (Roblox Login)
- Open the Figma plugin → Log in with Roblox (plugin auto-switches to Code mode)
- When prompted, grant permission to upload images to your Roblox account
- Select a frame in Figma
- Click “Export Code” → Wait for images to upload
- Click “Copy Code”
- Open Studio plugin → Go to Paste Code tab
- Paste the code → All images are already mapped (asset IDs baked in)
- Click “Import”
Live Mode (Real-time)
- Open the Figma plugin → Log in with Roblox
- When prompted, grant permission to upload images to your Roblox account
- Open Studio plugin → Click “Connect”
- Switch to Live mode in the Figma plugin
- Select a frame → Click “Send to Roblox”
- UI appears instantly in Studio viewport
- Make changes in Figma → Send again → Updates in place
Note: Live Mode requires HTTP Requests enabled in game settings (Experience Settings → Security → Allow HTTP Requests).
Quick Comparison
| Live | Code | ZIP | |
|---|---|---|---|
| Roblox Login | Yes | Yes | No |
| Studio Connected | Yes | No | No |
| Image Upload | Automatic | Automatic | Manual (Asset Manager) |
| HTTP Requests | Required | Not required | Not required |
| Best For | Rapid iteration | Sharing with team | Commission work |
What Gets Converted
| Figma Element | Roblox Instance |
|---|---|
| Frame/Group | Frame |
| Text | TextLabel |
| Vector shapes | ImageLabel (auto-exported as PNG) |
| Image fills | ImageLabel (auto-uploaded) |
| Buttons (detected) | TextButton / ImageButton |
| Auto Layout | UIListLayout + UIPadding |
| Corner Radius | UICorner |
| Individual Corner Radius | UICorner per-corner properties with Native UI beta |
| Stroke | UIStroke |
| Linear Gradient | UIGradient |
| Drop Shadow | UIShadow with Native UI beta |